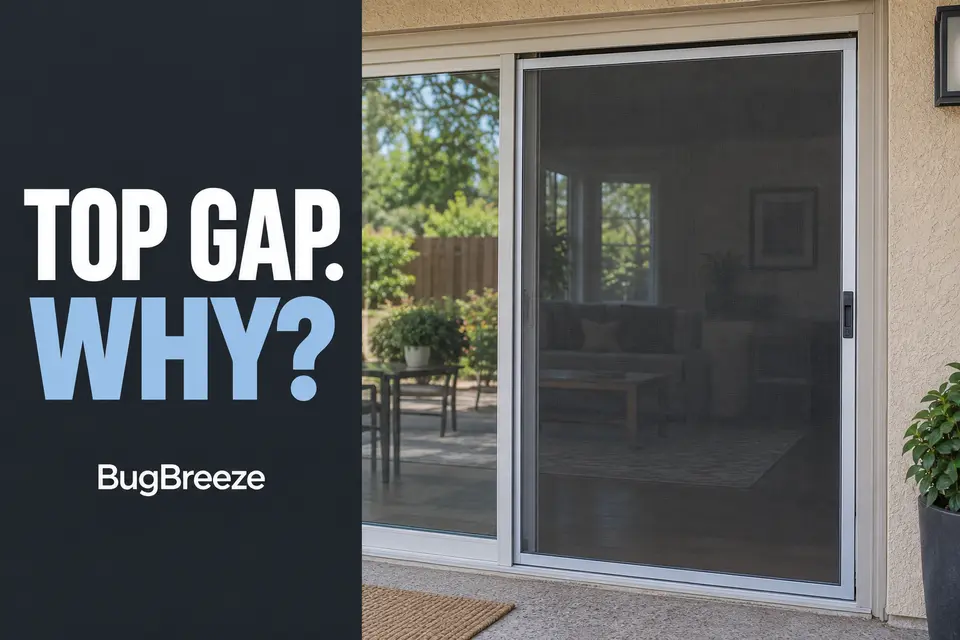
A closed sliding screen door should not need to be lifted, twisted, or pushed against the frame to cover the opening above it. If a visible gap remains along the top edge, first look at its shape. A nearly even gap across the full width points in a different direction than an opening that grows wider toward one corner.
Do not begin by adding thick weatherstripping or turning every adjustment screw you can find. The door may simply be sitting too low, but it may also be incompletely seated, unevenly supported, obstructed by debris, or unable to hold an adjustment. The useful first move is to observe the gap with the door closed naturally and change only one condition at a time.
The Likely Causes of Visible Top-Edge Gap On A Closed Sliding Screen Door
An even gap usually involves the door’s overall height
When the opening remains approximately the same width from one upper corner to the other, the entire screen frame may be sitting lower than intended. Both lower rollers may be adjusted too low, worn, or unable to support the door at its former height.
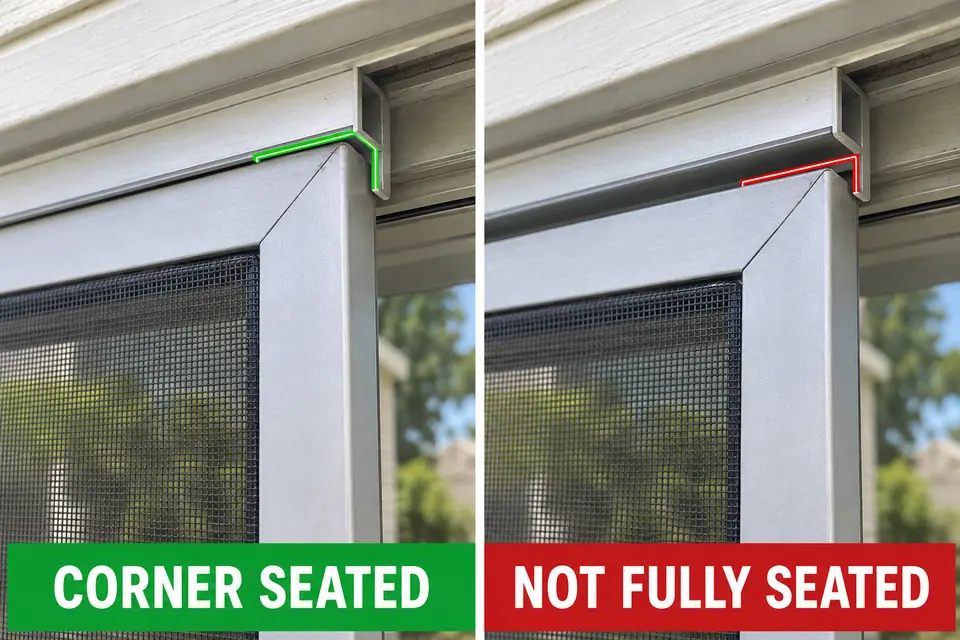
An even gap can also appear after the screen has been removed and reinstalled. The upper rail may look close to the guide while one or both top corners are not fully captured in their intended channel. In that case, adjusting the rollers before confirming proper seating can raise the door against the wrong surface.
Do not assume that every narrow shadow line is an insect opening. Look through the suspected gap from both sides or hold a steady light behind it without pressing on the door. The concern is a continuous open path, not the normal visible joint between two overlapping pieces of frame.
A tapered gap points toward unequal support
If the gap is narrow at one end and progressively wider toward the other, the screen door is sitting out of square relative to the fixed opening. One lower roller may be carrying less of the door, one corner may be adjusted lower, or a localized obstruction may be changing how the frame sits.
A light aluminum door can also become racked or bowed after an impact. The gap shape alone does not prove that the frame or a roller is damaged, however. It tells you which corner to compare and where a careful response test should begin.

What Changed Before the Symptom Started
The timing of the gap can shorten the diagnosis considerably. If it appeared immediately after seasonal storage, cleaning, painting, or screen removal, begin by checking whether the door was returned to both tracks correctly. A door can still slide while one upper corner is sitting lower than it did before.
A recent adjustment is another strong clue. If someone raised or lowered only one roller, the door may now close at an angle. If both sides were lowered to make removal easier and were never restored, the result may be a relatively even top opening.
Consider changes that did not involve the adjustment screws as well. Packed grit, dried mud, leaf fragments, or winter residue can alter how the lower rollers ride and how consistently the door settles. If the symptom followed seasonal buildup, use the full process for cleaning a sliding screen door track after winter instead of scraping only the most visible section.
A gap that develops gradually is more consistent with wear, loss of roller support, or a frame that no longer holds the same geometry. A sudden change after the door was struck, forced, or derailed makes local track damage or frame deformation more important to inspect.
How to Identify the Part or Fit Condition Behind the Symptom
Start with the door fully closed under its own weight. Compare the space above both top corners, then look along the top rail to see whether it remains reasonably parallel to the fixed frame. Do not lift the handle while judging the fit; lifting can temporarily conceal the condition you are trying to identify.
Field Check: Support the door before any action that unloads or lifts it, and do not force a lightweight aluminum frame into position. If the door becomes unstable in its tracks, stop rather than trying to hold and adjust it simultaneously.
Confirm that the door is seated
Inspect both upper corners from an angle where the upper guide or channel is visible. Each corner should be captured by the intended track arrangement, not resting below it or against adjacent trim. Compare the two sides rather than relying on one difficult viewing angle.
Next, inspect the accessible lower roller path and the upper guide for a localized obstruction. A small packed deposit can hold one corner away from its repeatable position. Remove loose debris with a brush or vacuum before making a mechanical adjustment; do not drive a tool into a narrow channel where it can deform thin aluminum.
Test whether height adjustment is appropriate
Find the roller-adjustment access points near the lower corners. Before turning anything, photograph or mark the starting position. Screw direction and access arrangement vary among doors, so do not assume that a particular turning direction always raises the frame.
If the top gap is tapered and the wider end corresponds with a low door corner, make one small change at that corner and watch for actual movement. If the whole top edge sits low, both sides may eventually need correction, but they must remain balanced. Raising both corners aggressively can jam the top rail into the guide or reduce reliable track capture.
The detailed procedure for adjusting sliding screen door rollers should be used once the top-gap pattern confirms that height adjustment is the correct path. This page’s diagnostic question is simpler: does the suspected corner respond, and does that response reduce the gap without creating another fit problem?
Match the clue to the next action
- Even top gap, both corners properly seated: Compare overall door height and test small, balanced roller correction.
- Tapered gap, one corner visibly low: Check that corner’s track contact and adjustment response before changing the opposite side.
- Gap appeared after removal: Correct incomplete seating before altering the roller settings.
- Gap remains after a responsive adjustment: Inspect for visible track displacement, limited adjustment travel, or a distorted door frame rather than continuing to turn the screw.
Do not add weatherstripping merely because a narrow opening remains. Extra material can make the door appear sealed while leaving the frame incorrectly supported, and it may introduce drag when the door moves.
When Adjustment Will Not Rescue a Failed Part
Adjustment remains useful only while the door produces a controlled, repeatable response. If the screw turns but the corresponding corner does not rise or fall, continuing to turn it is not fine-tuning. The adjuster may no longer be engaging the roller assembly, the roller may not be carrying the door’s weight, or the mechanism may have reached its usable limit.
A corner that rises when lifted by hand but immediately drops after release provides another important boundary. The top gap can be hidden temporarily, but the roller or its support is not maintaining the new position. The diagnosis for a roller that spins while the door will not move explains how to distinguish loaded roller contact from an unloaded mechanism.
Look beyond the adjuster when the response is normal but the gap refuses to become even. Sight along the lightweight frame without pulling it straight. A visibly bowed top rail, twisted stile, separated corner joint, cracked track, or severely displaced guide cannot be squared permanently by changing roller height.
Also watch what happens after one complete opening cycle. If the door fits when first adjusted but drops, shifts, or loses upper capture as soon as it moves, the correction is not stable. Return to the marked starting point if the change made operation worse.
Repeated loss of track position is a separate failure pattern. When the top gap accompanies a door that repeatedly climbs out of or drops from its track, continue with the diagnosis for a sliding screen door that keeps coming off track rather than using additional height as a substitute for stable capture.
Stop adjusting when the screw no longer creates visible movement, the door cannot remain supported at the corrected height, or the frame and track no longer provide a square reference. More screw travel will not rescue a failed part and may strip an adjuster that was still serviceable.
How to Test the Screen or Door After Each Change
Close the screen without lifting the handle or pushing an upper corner into place. View the complete top edge from the same position used before the correction. A successful change should reduce the open path while leaving the top rail reasonably parallel to the fixed frame.
Then move the door through its full normal travel. Use ordinary hand pressure rather than forcing it through a tight area. Watch the upper corners as the door moves and confirm that they remain captured by the intended guide arrangement.
A height change that closes the top gap but creates scraping, binding, or intermittent track loss is not a completed repair. Reverse the last change or reduce it until both fit and movement are stable.
Post-change verification
- Close the door naturally without lifting or twisting it.
- Inspect the entire top edge, not just the corrected corner.
- Slide the door through its full travel several times.
- Confirm that both upper corners remain captured.
- Close it again and check that the gap has not returned.
The most meaningful result is repeatability. If the gap disappears once but returns after several opening and closing cycles, the adjustment treated the visible position without correcting the condition that controls it.
Because roller layouts and adjustment directions vary, confirm model-specific procedures through the door manufacturer’s documentation or a manufacturer support resource such as the Pella Support Center.